- Canva Classroom Recipe: Personalized bookmarks for every reader
Canva Classroom Recipe: Personalized bookmarks for every reader
Kathi Kersznowski, an Educational Technology Specialist in New Jersey, is a teacher of teachers, global presenter, keynote speaker, author, and edtech energizer! She is a Google Certified Educator and Trainer, MIEExpert, Apple Teacher and Coach, author of “The Educator’s Guidebook for Teaching AI Literacy and Ethics”, and co-author of "Sail the 7 Cs with Microsoft Education.” She’s an ambassador or consultant for many of the world’s leading edtech companies – including being a proud Canvassador! Kathi has been an elementary teacher, a special ed teacher, and she has a Master's in School Administration. Find her on social media as @kerszi or at Kerszi.com.
💡 Ready to create your own classroom recipe? Submit your innovative Canva classroom activities(opens in a new tab or window) and you could be the next to be featured!
Activity overview
I love using this activity to introduce anyone - students and teachers - to Canva! Instead of facing a blank page, learners open a pre-made template with four bookmarks already designed. From there, the challenge is simple: just change something. Swap an image, delete an element, resize a shape, or change a font. This simple bookmark project has become my go-to way to introduce Canva to both students and teachers. The goal is to build confidence first, creativity second.
Rather than starting with a blank page, learners begin with an existing design, so there’s no intimidation factor, just exploration. I model each change on a projected screen, demonstrating how even small adjustments like swapping an image, deleting an element, or recoloring text. Each one of these small changes can completely transform the look and feel of a design. When I model each edit live, I can almost feel the room relax once everyone realizes that Canva is wonderfully forgiving (thank you, Undo button!). From that point on, they’re not just following instructions - they’re designing! Each of the four bookmarks becomes a small canvas for trying new tools. The beauty of this activity lies in its perfect balance: hands-on practice with fundamental design principles while creating something they’ll actually use and be proud to share.
Each bookmark becomes a mini design challenge, encouraging play-to-learn enthusiasm! Learners easily build confidence with Canva’s awesome tools such as searching for elements, changing text, background removal, adding shadows, layering elements, color adjustment, and transparency effects. It’s an inviting way to show that everyone, no matter their tech comfort level, can design something beautiful in Canva. The best part is that the end results are always unique, and that’s exactly what makes this activity such a powerful and fun way to get started with Canva!

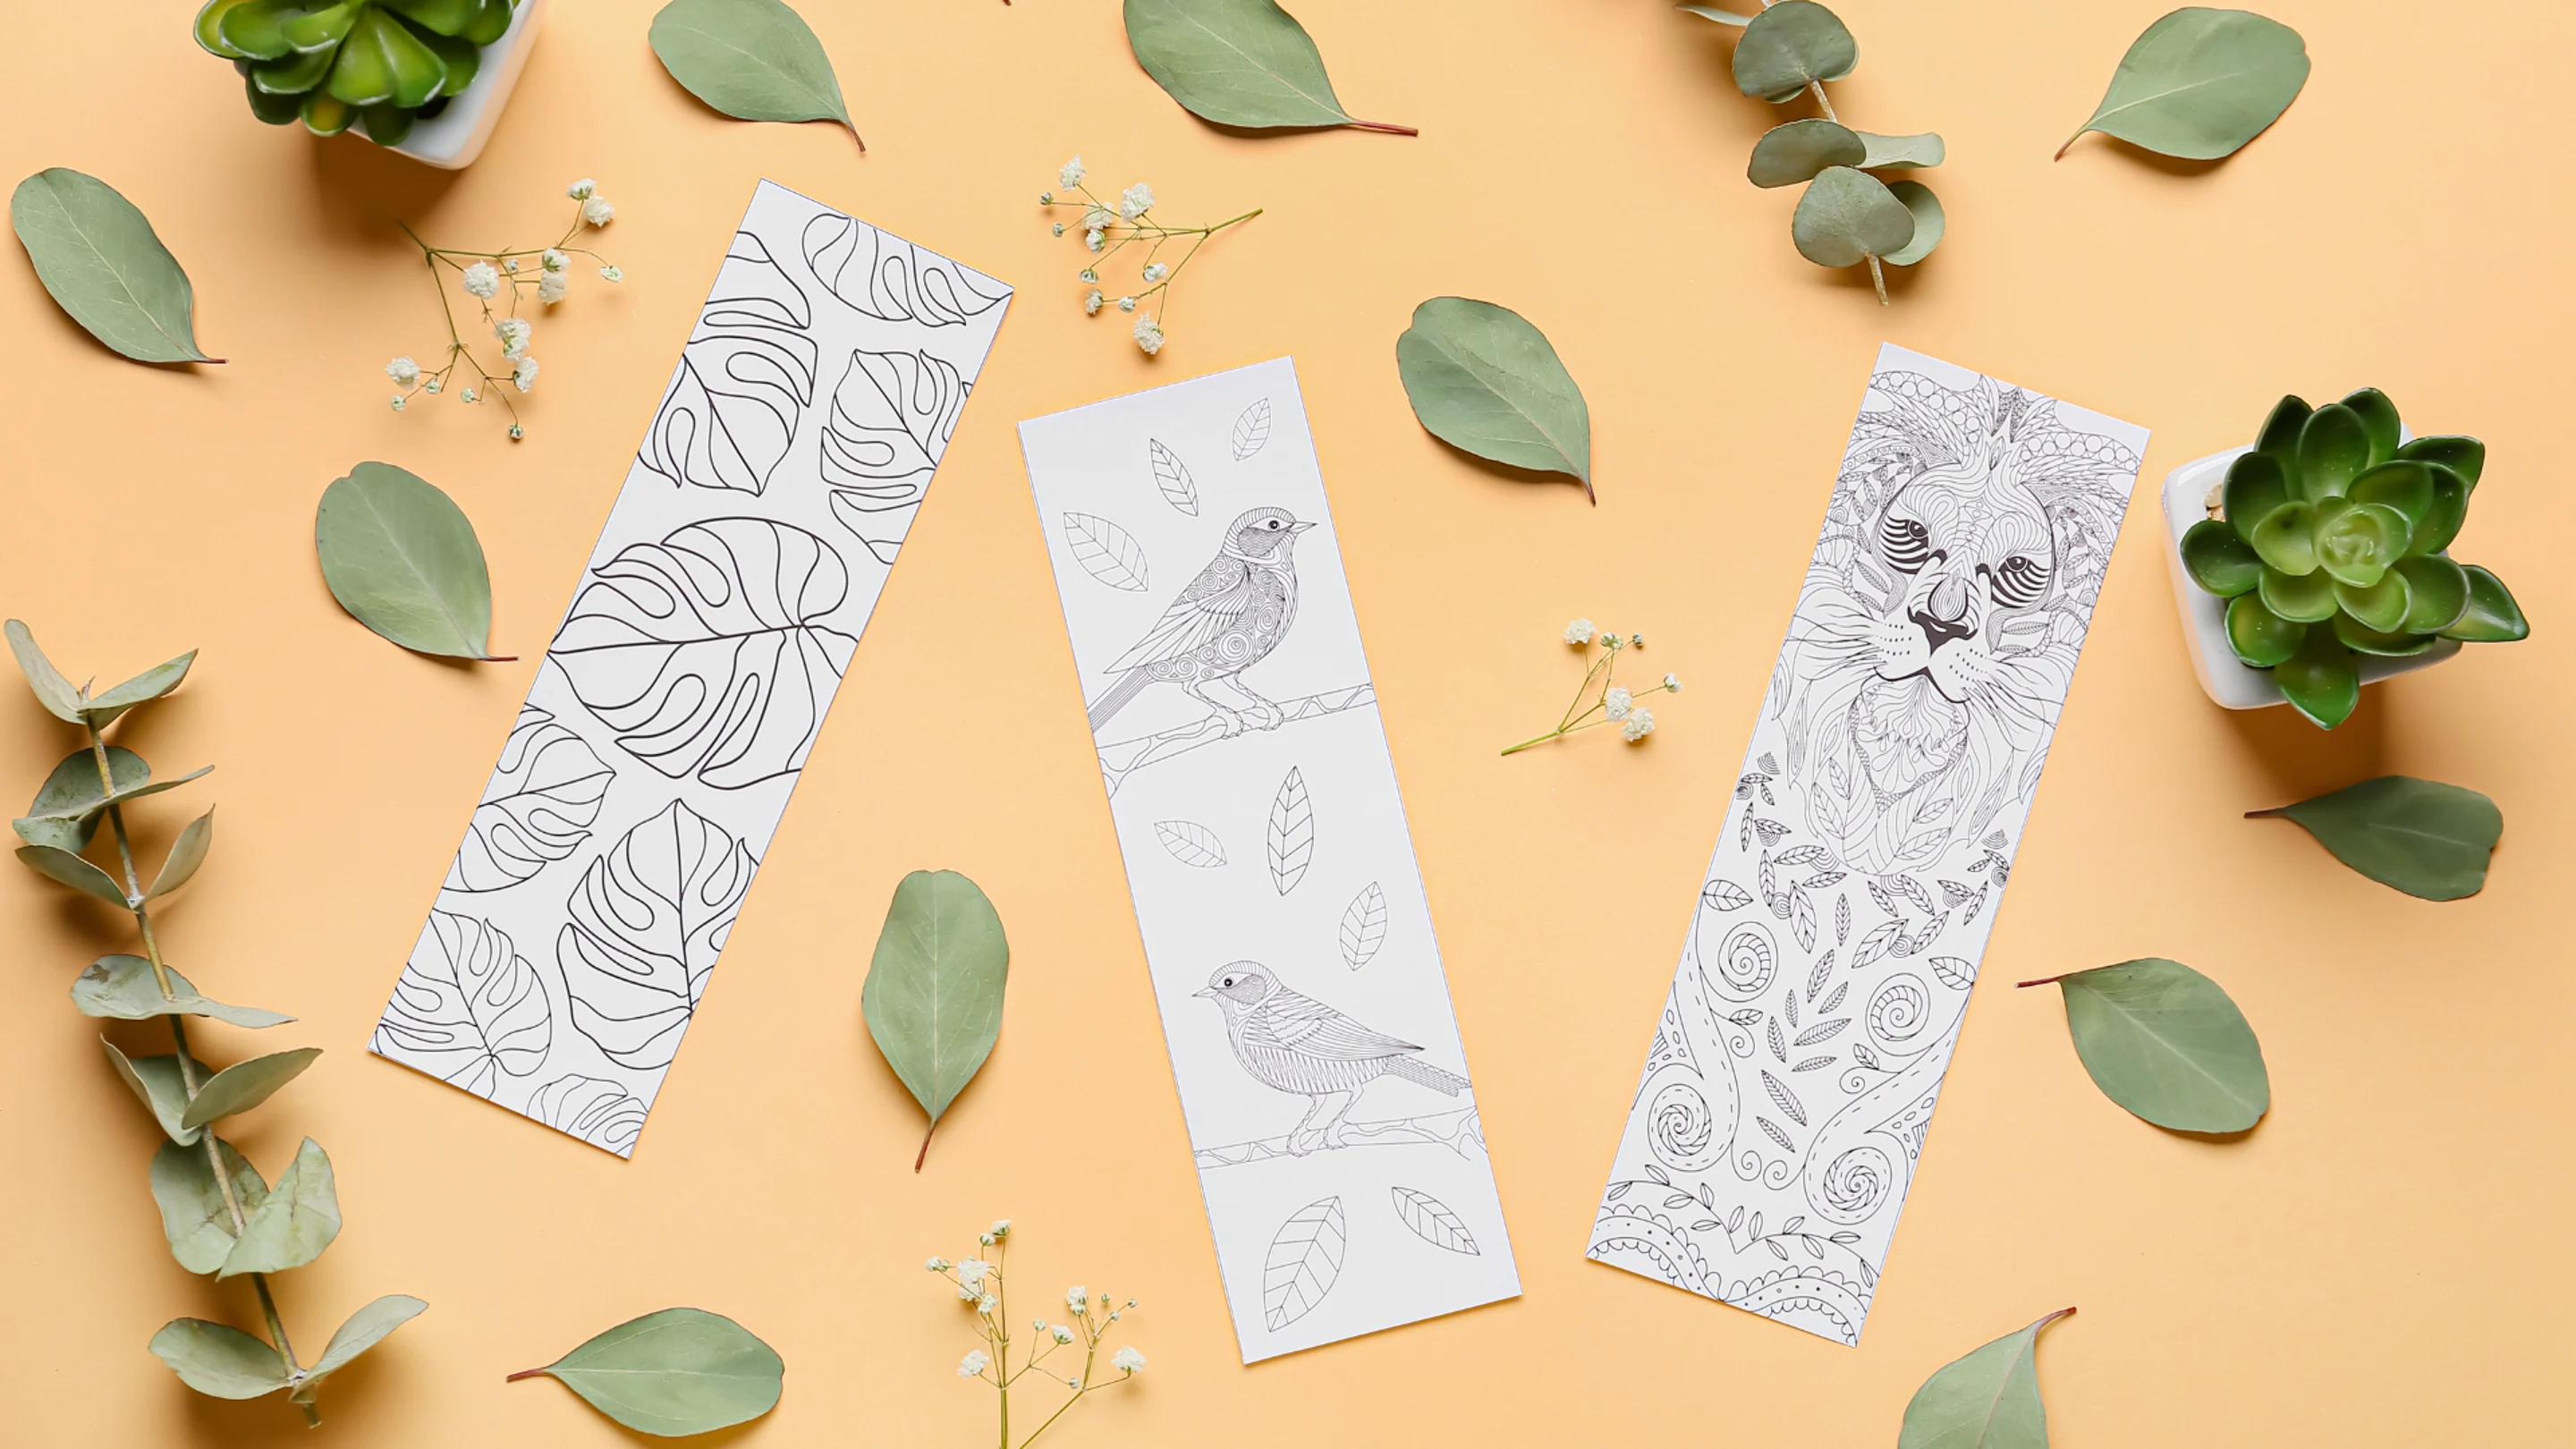
Sample student output
Quick snapshot:
- Grade Level: 2-12
- Subject: Any subject area / Digital literacy
- Duration: 2-3 class periods
Learning Objectives:
- Master fundamental Canva navigation and tool usage
- Search for and add visual elements effectively
- Apply advanced editing techniques including background removal and transparency adjustments
- Understand design principles through hands-on color, shadow, and layout choices
Preparation
Essential Canva features:
- Element library with search functionality
- Background remover tool for clean image editing
- Color adjustment panels for customizing elements
- Transparency and shadow effect options
- Border tools with color customization
- Download and print settings
Requirements:
- Access to Canva Education accounts for all students (see how below)
- Students should have basic computer navigation skills
- Consider having students brainstorm their four bookmark themes beforehand
- Printer access for final bookmark production (optional but recommended)
- Cardstock paper for final bookmark production (optional but recommended)
Time allocation:
- Class period 1: Template exploration and first two bookmark designs (45 minutes)
- Class period 2: Advanced editing techniques and final two bookmarks (45 minutes)
- Class period 3: Printing, cutting, and sharing showcase (30 minutes)
Teachers: If you haven’t already, sign up for Canva Education here(opens in a new tab or window)- it’s 100% free for verified primary high school teachers and their students, and will unlock all of Canva’s premium features plus more.
Inviting students: In your Canva Education account, go to Homepage → Open the side menu -> “Invite people” and share the join link or class code with your students. If your school district has already rolled out Canva Education through SSO, they can simply log in(opens in a new tab or window) with their school email address to access the full education features.
Schools and districts: Discover how to implement Canva Education across your entire district(opens in a new tab or window), enabling your teachers, students, and staff to collaborate and communicate visually - all at no cost!
Step by step implementation
Step 1: Template setup and theme planning
Students begin by accessing Canva and open the blank template(opens in a new tab or window). Before diving into design, students should identify four different themes - but here's where it gets personal: encourage them to think beyond just their own interests. They might create one bookmark for themselves and three as personalized gifts for family members, friends, or teachers based on what those people love. This approach transforms the activity from a simple design exercise into a thoughtful gift-making experience.
Start with a blank template
Step 2: Design fundamentals with element search and placement
Students start designing each bookmark by adding background colors or patterns, then learning to effectively search Canva's element library. Demonstrate how specific keywords yield better results - for example, if designing for a grandmother who loves cats, searching "watercolor cats" produces more appealing results than generic "animals." Students practice fundamental skills like dragging, dropping, and resizing elements while thinking about visual balance and the recipient's preferences.
Step 3: Advanced editing and professional touches
This is where students elevate their designs using Canva's sophisticated tools. Show them how to use the Background Remover to clean up element edges, adjust transparency for layered effects, and modify colors to match their themes. The shadow tool adds depth and professional polish. Students also learn to add borders around each bookmark section and include text elements like the recipient's name, inspirational quotes, or themed messages that would be meaningful to that specific person.
Use the Background Remover tool to clean up photos or elements
Step 4: Quality check and preparation for sharing
Students review each bookmark for design consistency and readability, considering whether each design truly reflects the intended recipient's interests. Show them how to use Canva's download options for appropriate print quality. If printing in class, demonstrate how the 8.5 x 11 format allows for easy cutting into individual bookmarks that students can take home as gifts or keep for themselves.
Common challenges and solutions:
For many beginners, the biggest hurdle isn’t technical—it’s emotional. New users often worry they’ll “mess something up.” I always start by introducing the Undo button right away, because it gives everyone permission to explore without fear. Once learners understand that every action can be reversed, they relax, experiment, and start discovering what Canva can do.
Another occasional hurdle is precision. Learners sometimes struggle to get elements perfectly aligned or sized. Canva’s snap-to-grid and alignment guides are lifesavers here, and I always make a point to demonstrate them early in a lesson.
Interestingly, one of the best “solutions” doesn’t come from me - it comes from the group. When I encourage everyone to talk aloud while creating, the room fills with shared discoveries…and I often get to learn new things, too! Someone finds a new font, someone else learns to recolor an icon, and before long, the learning becomes communal and they’re teaching each other!
Finally, if someone feels overwhelmed by the sheer number of choices Canva offers, I always suggest they start by just editing what’s already on the page - change a color, swap an image, or move one shape. Every little change builds confidence, and by the end, learners aren’t just making bookmarks - they’re making projects they’re really proud of!
Assessment and Showcase ideas
Presentation approach:
Create a "Bookmark Gallery Walk" where students display their printed bookmarks on desks and rotate around the classroom to view each other's work. Provide small sticky notes for peer feedback, encouraging students to identify which design techniques they'd like to try in their own future projects.
Marking rubric:
- Technical skill demonstration (40%): Effective use of Canva tools including background removal, color adjustments, and transparency effects
- Design principles and visual appeal (30%): Color harmony, visual balance, and appropriate element selection
- Theme consistency and creativity (20%): Clear connection between chosen themes and design choices
- Completion and craftsmanship (10%): All four bookmarks completed with attention to detail
Reflection prompts:
- Which Canva tool did you find most useful and why will you use it in future projects?
- How did creating four different themes challenge you to think about visual design differently?
- What design choices would you make differently now that you understand these tools better?
- How might you use these bookmark design skills for other school projects or personal interests?
Differentiating this recipe to suit your classroom
To challenge students:
Encourage advanced students to play with Canva’s more creative features - like building custom color palettes, experimenting with text effects, or exploring some of the apps that work with Canva. You might challenge them to experiment with visual balance - playing with contrast, symmetry, and spacing to see how small changes can totally transform a design. Some of my favorite extension ideas are when students create a coordinated set of bookmarks that tell a visual story or add QR codes that link to a related video or resource.
To make this activity easier:
For younger students or those needing extra support, provide pre-selected element collections for each bookmark theme, reducing the overwhelm of searching through Canva's extensive library. Create step-by-step visual guides showing exactly where to find each tool, and consider pairing students so they can help each other navigate the interface. You might also reduce the project to two bookmarks instead of four, allowing more time for skill building and experimentation.
To flex this recipe for different subject areas:
This project works beautifully across subjects. In Language Arts, students can design bookmarks inspired by different literary genres or favorite novels, adding quotes or character illustrations. Science classes might create bookmarks showing the steps of the scientific method, key vocabulary with visuals, or fun graphics to showcase life cycles or phases of the moon. Math students can design formula bookmarks featuring geometry shapes, area and perimeter reminders, or quick-reference tips for problem solving. Social Studies classes could create historical timeline bookmarks or ones that celebrate the cultures and time periods they’ve studied.
Ready to get started?
Start small by having students create just one bookmark first to familiarize themselves with the basic tools, then expand to the full four-bookmark project once they're comfortable with the workflow.
Share your students' personalized bookmark designs by tagging @CanvaEdu on X or posting them in the Facebook Teachers Community(opens in a new tab or window). We'd love to see how creativity and learning come together through this hands-on design activity!
Ready to create your own classroom recipe? Submit your innovative Canva classroom activities(opens in a new tab or window) and you could be the next to be featured!

