- 10 creative self-portrait techniques that will inspire you to create your own
10 creative self-portrait techniques that will inspire you to create your own
If you’re used to directing others from behind the safety of your camera, putting yourself on the other side of the lens can seem like a daunting task.
Taking a self-portrait, however, can be a uniquely satisfying experience. After all, when else do you get to take on the roles of lead photographer, assistant, and subject all at once?

Photo by Reinhart Julian
Before you get started, make sure you have the basics: namely, a trigger for your camera. You have a couple of choices: First off, your DSLR probably has a self-timer function. You can use this to trigger your camera. The upside—no new equipment needed.
The downside—you will have to make a mad dash to the front of the camera to take a shot. This is by no means a deal-breaker, but if you are looking for greater flexibility, another option is to invest in a remote trigger.

Photo by Jose Llamas
As for how to focus your camera on yourself, there are some obvious steps to increase your chances of perfect focus, such as using a smaller aperture and making sure your camera is on manual focus.

Photo by Peony
To choose a spot to focus on, I find it easiest to bring along an extra tripod and place it where I will be standing or sitting in the portrait. Focus the camera on the extra tripod, remove it from the scene, then (very carefully) take its exact position.
Now comes the fun part: read through and experiment with any of these 10 self-portrait techniques to get you started.
01. Seek out a new perspectives
If you’re racking your brain for self-portrait ideas, start simple. Sometimes, everyday scenes can be brought to life just by looking at things from a different perspective.

Photo by Caju Gomes
Find a picture-perfect spot with decent lighting—it might be under a tree at your local park or by a window in your bedroom—and experiment by framing yourself via unusual angles and distances.

Photo by Rendiansyah Nugroho
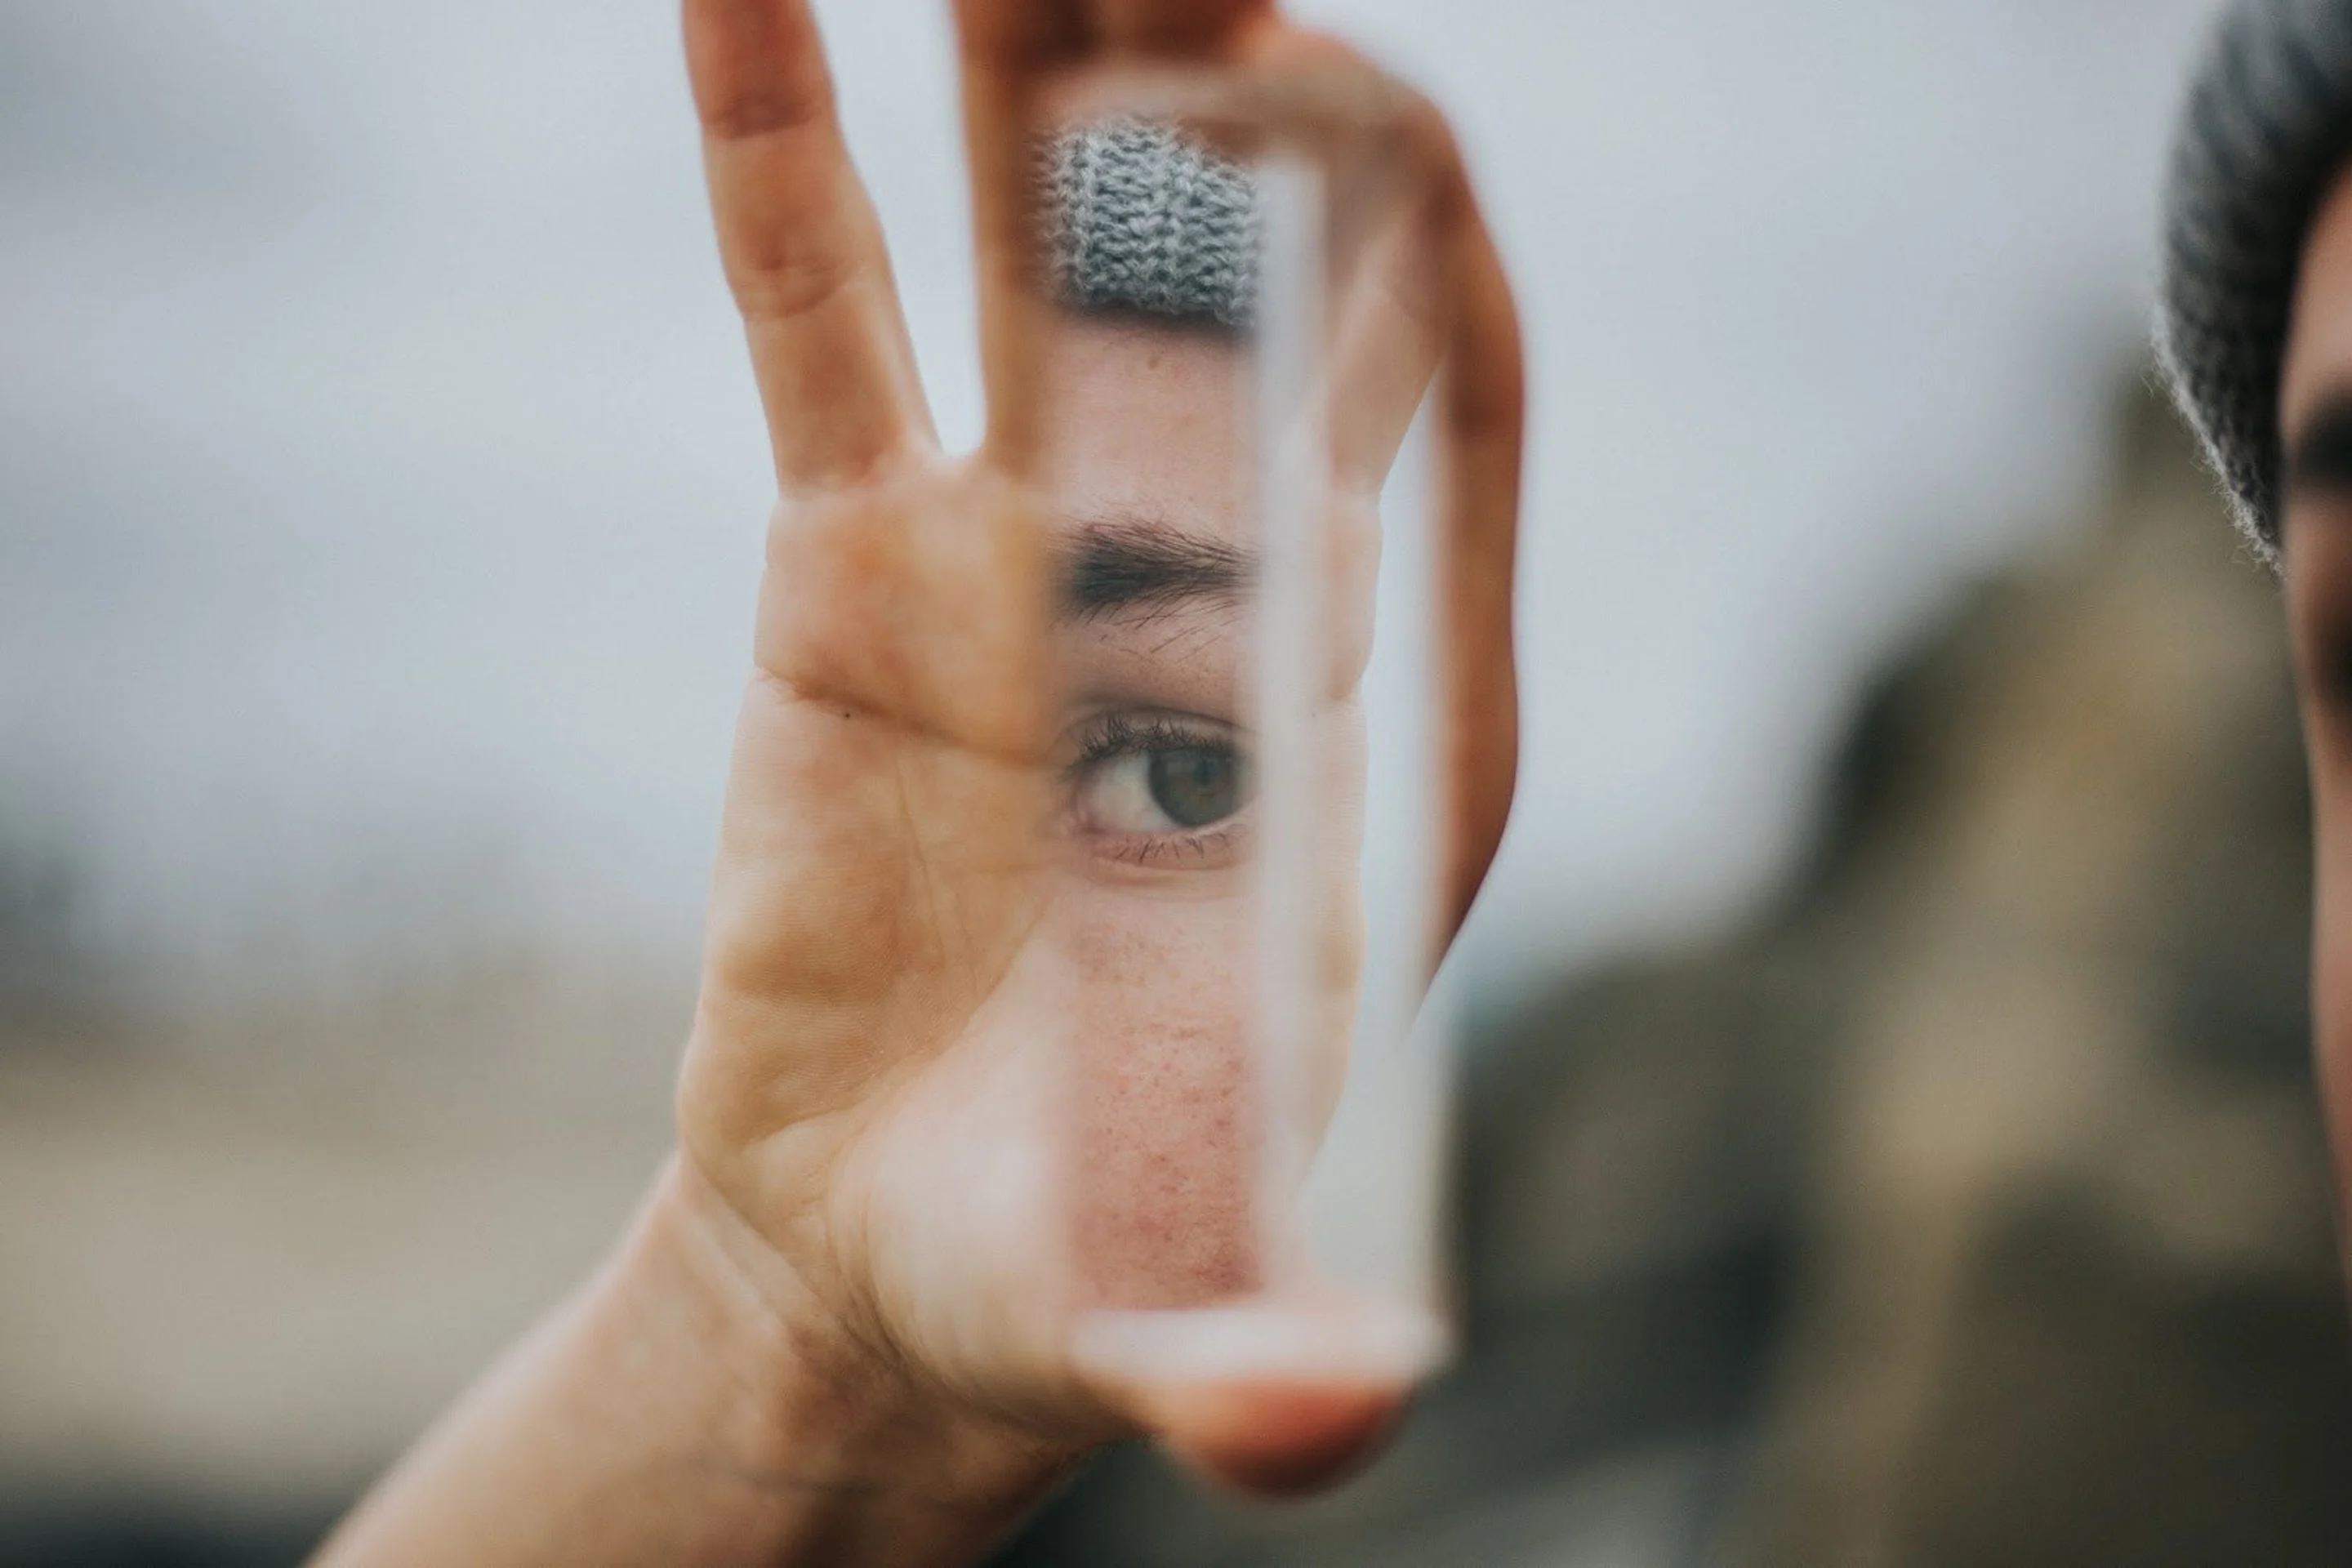
You can use close-ups (and even ultra close-ups) to draw your viewer’s attention to a particular body part or facial feature that you would like to highlight. This creates a greater sense of intimacy and offers a different take on the traditional self-portrait.

Photo by Jessica Flavia
02. Let your reflection show
We have all seen plenty of mirror selfies, but don’t overlook the potential of this Tinder favorite. You can create a truly beautiful shot using a mirror or other reflective surface.
The key to a good reflection shot is to draw the viewer into the scene. Although you are the subject, widening your shot to show not only what is reflected, but also what is in front of you, will make the shot more interesting.
For example, if you find a unique mirror sitting on a wall in a well-composed space, then photographing your reflection as just a single element in the whole scene can make for a wonderful self-portrait.

Photo by Pablo Guerrero
These types of self-portraits come with the added bonus that you are still able to photograph yourself from behind the camera—meaning you don’t have to deal with triggering and focusing issues.

Photo by Marc-Olivier Jodoin
Keep in mind that your options for reflecting your portrait go way beyond just mirrors. Start looking at any reflective surface (such as shop windows or even puddles of water) as possible self-portraits in the making.
03. Get lost in a scene

Photo by Ben Weber
If you want to move away from a standard self-portrait, try basing your composition around a unique landscape or streetscape that reflects something about you.

Photo by Taya Iv
It may be your favourite path in the park to hike through or along the street where you do your daily coffee run. Ordinary, everyday spaces can transform into poignant backdrops for your self-portrait.

Photo by Riki Ramdani
Experiment with where and how you place yourself within the scene. For example, try maximizing and minimizing your presence—your prominence or obscurity can itself send a message as part of your self-portrait.
04. Do a double take
Double exposures let you combine two images into a single self-portrait. The term comes from the days ofshooting with analog film and was achieved by winding a frame backwards and shooting twice over an exposure. Of course, with film, you had much less control over how the two images were overlaid and had to hope for the best when it was time to develop the roll.
When you create a double exposure digitally, there is a lot more room for experimentation and control. You can shoot and edit the images you want to combine, then use layers and blending through a photo editing software to bring the two photos together.
Your options are limitless. You can shoot the same scene upside down and right side up; shoot yourself moving through a physical sequence; and even combine your silhouette with a pattern by overlaying your image(opens in a new tab or window) with a busy scene.

Photo by Nicolò Bonazzi
One tip before you go out shooting: start by shooting a dark image as the base of your double exposure, such as a street at night or your silhouette. The dark areas of this image will do a good job at revealing the second image when they are combined.
05. Play with shadows
Try playing with light and shadows to bring your self-portrait to life. This works two ways: you can either work with light shapers to create patterns on your face, or you can make your shadow the subject of your self-portrait.

Photo by Anderson W Rangel
If you would like to use light shapers to create shadows on your face, there’s no need to get any special equipment.

Photo by Geo Martinez
Use pieces of card or any other solid material to create hard-lined shadows. You can also have fun with fabric (such as lace) or foliage to create a more whimsical pattern.
06. Add drama with lighting
If you have accumulated some artificial lighting gear in your photography adventures, self-portraiture is an excellent opportunity to try out a studio lighting setup on your most willing (and cheapest) model—yourself.

Photo by Ethan Haddox
You can use different lighting setups and techniques to create professional, well-lit self-portraits.

Photo by Claudia Stritof
Not only is self-portraiture a completely safe outlet to work on your lighting techniques, it will also give you a greater appreciation of a professional models’ skills, and help you better understand how to effectively direct your future subjects.
07. Look through the lens
This one is quite specific, but it's an interesting exercise in self-portraiture nonetheless. Express your love of photography with this cool, self-portrait trick.

Photo by Benjamin Barnes
Take one of your lenses and remove the front and rear cap. A shorter lens such as a 50mm prime usually looks best in your hand.
Hold the lens in front of you with the front of the lens facing your camera. You’ll need to hit the sweet spot where your image is clear in the center of the lens, so standing in front of a mirror will help.

Photo by Andreas Kind
Remember that since everything is inverted in the lens, left and right, and up and down will all switch. Give it a go in front of a mirror beforehand and you’ll figure out what the final image should look like.
08. Think outside the box

Photo by Talles Alves
Create a literally unreal self-portrait with a composite image. Digitally cut and paste elements from different photos and combine them through post-processing in any way you like. Send yourself into space, defy gravity, or create hallucinatory illusions—your imagination is the only limit.

Photo by Elias Ruiz Monserrat
09. Say it with black and white
Just as new technologies can give your self-portrait a greater impact, so can stripping it down to its simplest elements. A black and white self-portrait can be used to emphasise drama and emotion, or to generate a sense of nostalgia.

Photo by Peter Sjo
Black and white photos are particularly effective when your image highlights a strong contrast between light and dark. You can also use strong lines or patterns through shadows to draw the viewer in.

Photo by Ariel McKinney
You can achieve very different black and white results depending on how you edit your photo. Play around with the depths of your blacks and whites, mix colors, and split tones to see what look best suits your portrait and your photography style.

Photo by Nik MacMillan
There are also more black and white editing presets out there than you can poke a stick at; so take the time to check them out and download to your heart’s content.
10. Use color to enhance the mood
Another option is to give your self-portrait a more eclectic feel with the use of color gels.

Photo by Mike Monaghan
Gels are color filters that you place in front of strobes or off-camera flashes. Gels look similar to colored cellophane but tend to be more dense to achieve a greater intensity of color.
You can blend red and blue gels against a dark background for a futuristic effect. When using two different colored gels in the same photo, be sure to place them at different angles, or at different heights. This way, you’ll get two distinct colors in your photo.
You can also replicate the look of color gels by taking advantage of neon signage outdoors. This technique heightens your self-portrait's mood, but still adds a level of street photography grit and realism.

Photo by Nik MacMillan
Remember that a self-portrait is meant to reflect who you are. It is a fantastic opportunity to explore your ideas of self, embrace vulnerability, and share yourself with others.
Use these self-portrait ideas to get the creative juices flowing and build on them to create a self-portrait that is true to you. Don’t tie yourself down to what other people have done before—follow your own instincts and make your self-portrait uniquely yours.

Written by
Maddie Manning


