- How to create magically surreal photographs using double exposure
How to create magically surreal photographs using double exposure
Surreal and dreamlike, double exposure is the term used for the unique effect created when two or more photographic exposures are blended or superimposed over each other to create a single image.
A technique that began with film photography, some digital cameras now allow double exposures to be created in-camera, and the process can also easily be replicated using digital editing tools. Whatever method you use, experimenting with double exposures is a fun way to unleash your creativity and create imaginative, artistic images.
Here, we’ll cover what you need to know to get started and introduce you to some of the different techniques you can try.
History
No one knows for sure who took the first double exposure, but by taking a step back to understand the science behind how photographic exposures work, we can learn how the technique has developed over time.

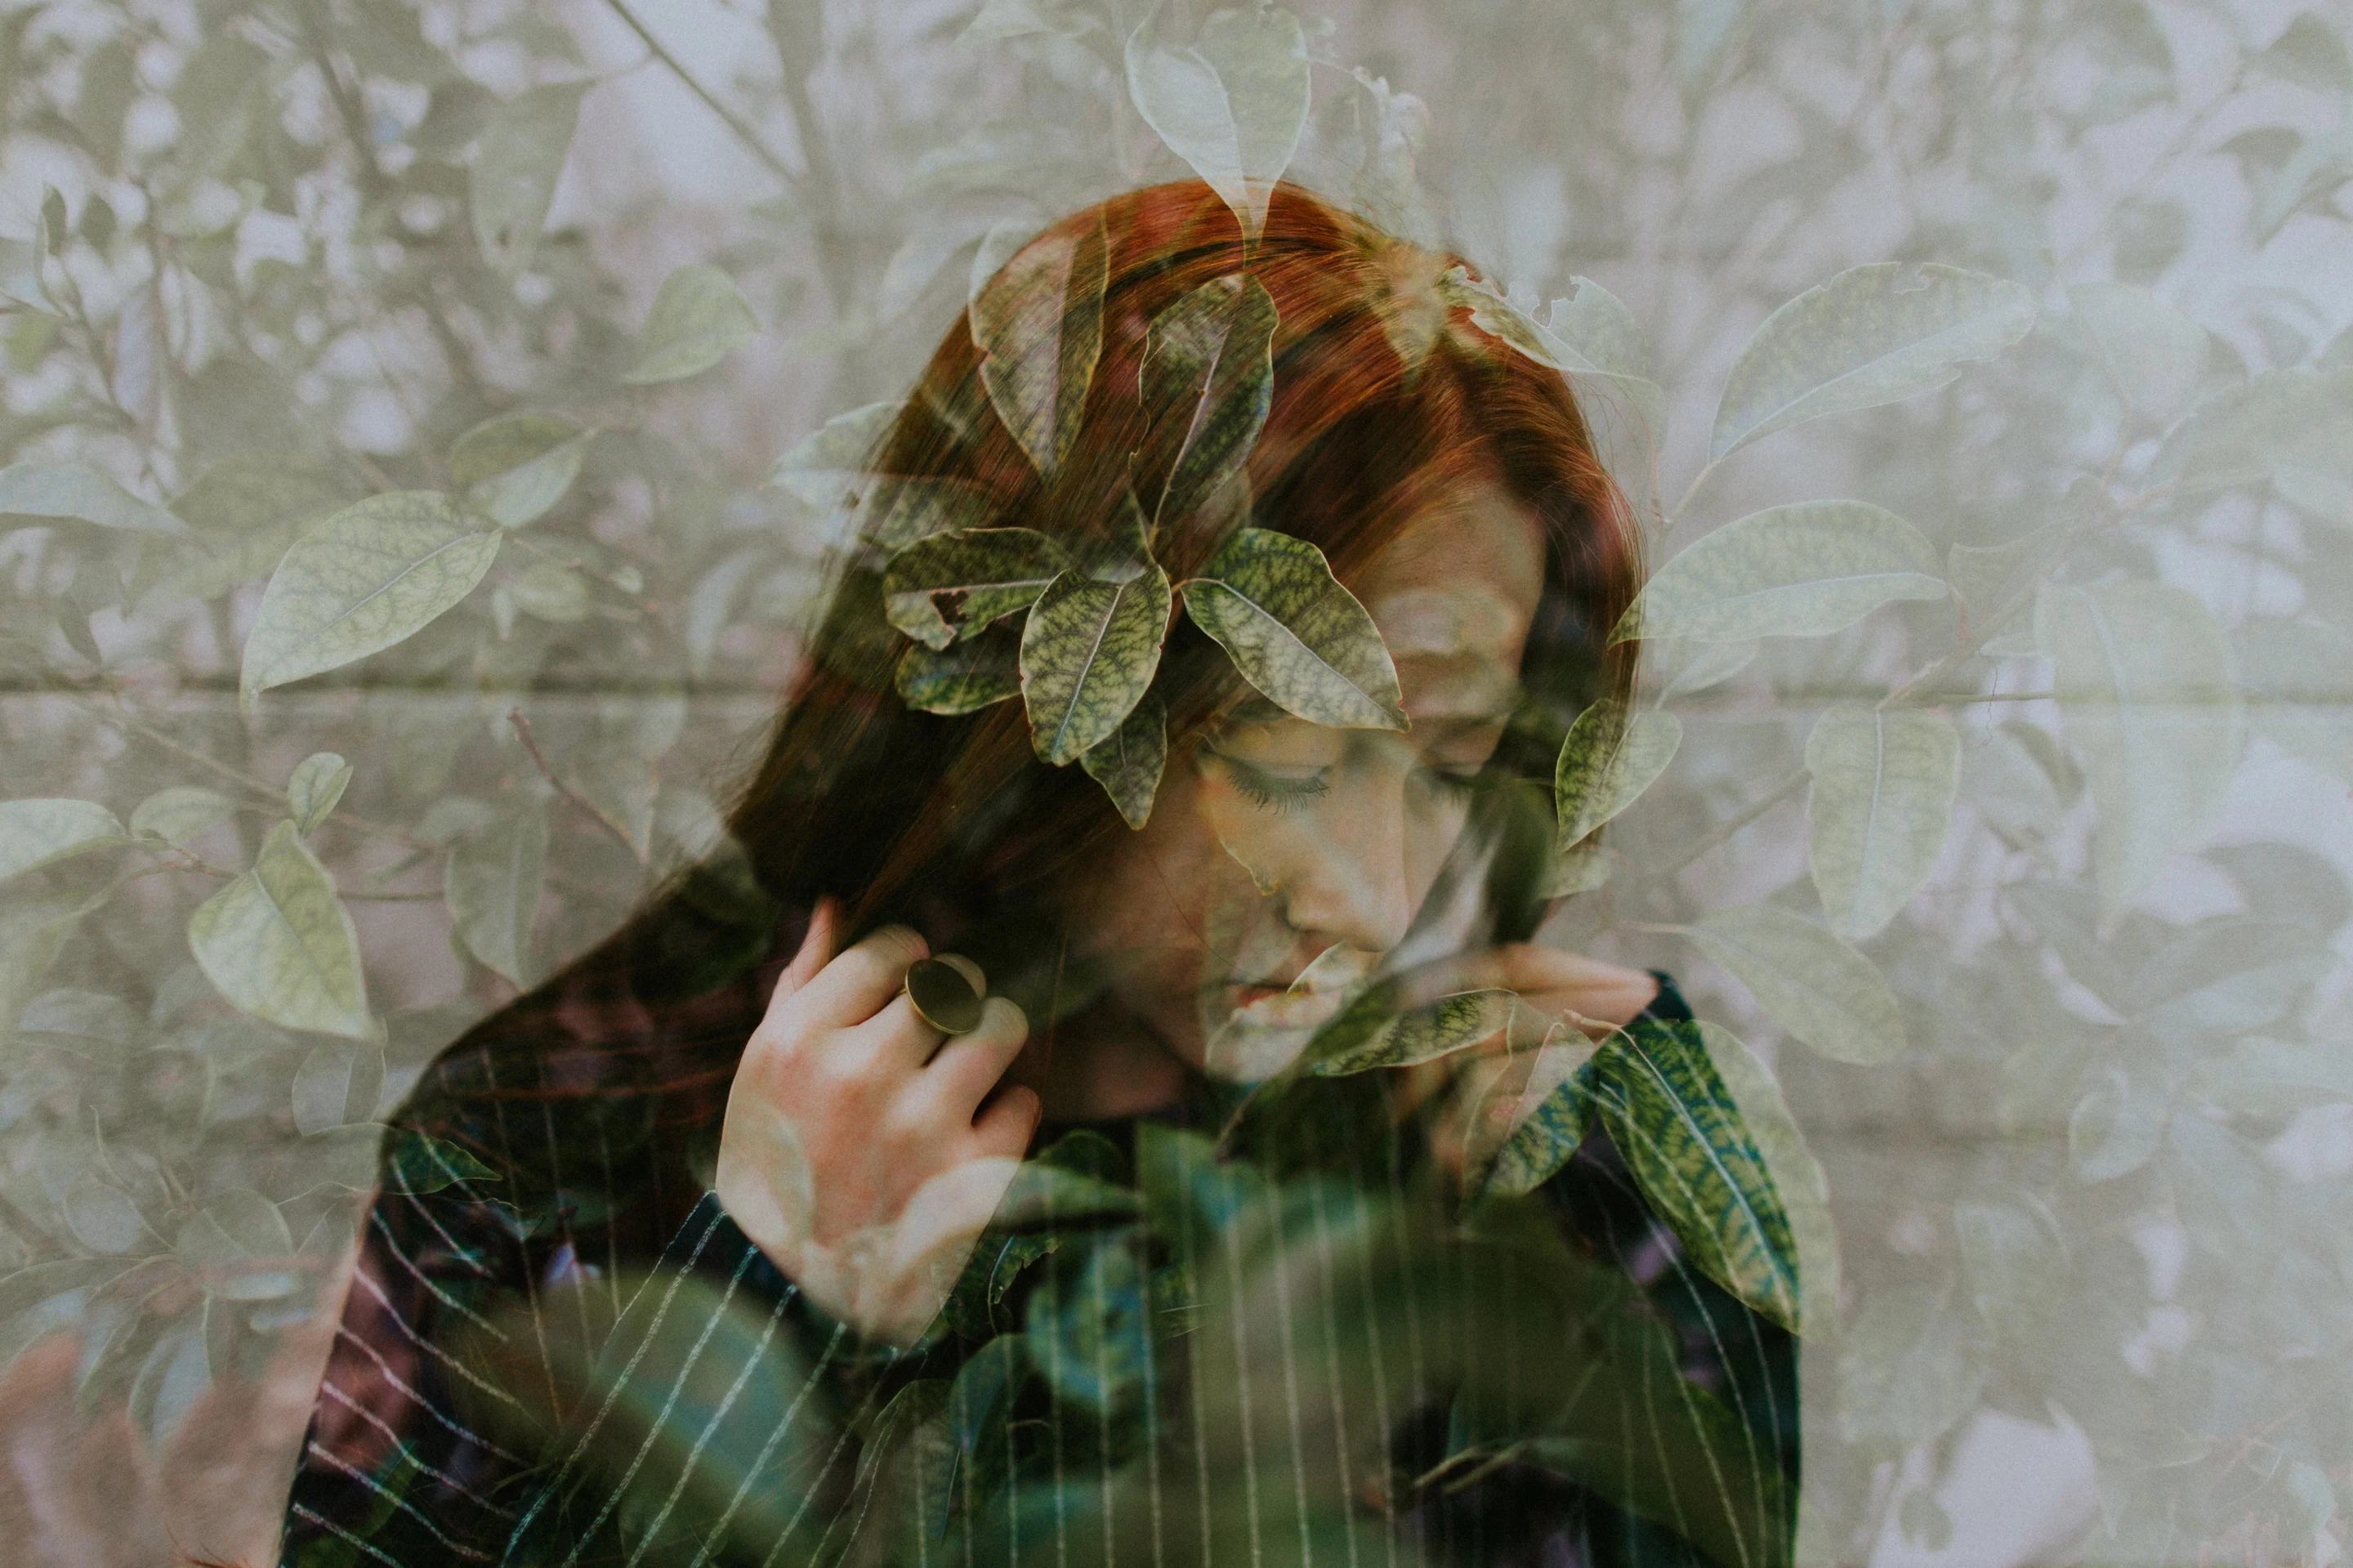
Photo found by simpleinsomnia
When capturing an image using analog film, the light hitting the film makes the particles on the film negative darken. When the film is developed, this creates an inverted image on the negative where the darkest areas of the film are the areas that received the most light. When the negative is then printed or scanned, the image is inverted back to what the human eye sees, and the darkest parts of the film appear white in the final image.
When capturing a photograph, the shutter is traditionally opened only once to create a clear image. But if the shutter is opened twice or more, the film will have been exposed to more than one composition. If this happens, the two separate compositions will overlay on the film.
If we think about how a film negative captures light—with the darkest parts of your final image being the lightest on your film negative—those parts of the film have the potential for more light to be captured. This is why exposing the film more than once before it is developed can create an interesting overlayed effect. We call this effect a double exposure.

Photo found by simpleinsomnia

Photo found by simpleinsomnia
Prior to the development of digital cameras and editing tools, double exposures were created within the camera. However, as darkroom techniques advanced, photographers discovered new ways to create a double exposure effect. They found that it was possible to use two or more separate film negatives and, in the printing process, combine them by creatively “sandwiching” them or selectively exposing the photographic paper.
These new techniques offered more control over the process, and as photographic technology continued to evolve, so did the ability to create double exposure photographs. These days, creatives have the freedom to experiment with both analog and digital methods.

Photo by Caique Silva
Capturing a Double Exposure with an Analog Camera
There are a few different approaches to creating a double exposure on film. Some film cameras have the option for multiple exposures, which means images can be shot consecutively.

Photo by Marcus Mailov
If your camera doesn’t have a multiple exposure feature, an alternative approach is to reload and re-expose the film a second time after shooting. If you are using the reload approach, however, be careful not to rewind the film all the way back into the canister when you finish the roll as this could make reloading it into your camera difficult.

Photo by alekstunaj
When you are ready to shoot, you will need to decide on the two images you want to combine(opens in a new tab or window). The first image will be superimposed with the second image you shoot. While there are endless options for what you can choose to photograph, good results can be obtained by making your primary image a silhouette with a bright background. Try positioning your subject against a white sky or white studio backdrop.
Because shooting multiple exposures will expose the same frame multiple times, it can be helpful to underexpose the film for the first shot to avoid overexposure. If you know how to manually expose your film, a -1 compensation works well if you are exposing the frame two times. Alternatively, shooting in medium to low light is ideal for double exposures.
A texture will work well for your second image. Trees, leaves, flowers, rocks or even water are all good choices. The details will fill the silhouette, creating an interesting composite. Keep in mind that your second image should be well lit.

Photo by Carly Webber
A fun idea is to turn your double exposures into a collaborative project. This works best with the reload approach. You could shoot an entire roll of primary images and pass the film onto a friend to take their own set of secondary textured images over the top.
Check out these great examples for inspiration:

Photo by Alexandre Maros

Photo by James Butler
Capturing a Double Exposure with a Digital Camera
If you don’t have a film camera you can use or want more control over your final image, you may prefer to take the digital approach. Some digital cameras offer a multiple exposure option, and if your camera offers this setting, this can be a great way to experiment with double exposure without the added cost of buying and developing film.

Photo by Foto-Rabe
Using a digital camera to create your double exposure is similar to the film method, but the results can be easier to control. While the final image is still created in the camera, you’ll be able to see it within seconds, rather than wait until the film is developed.
If your camera has a multiple exposure setting, you may also see an option to select the number of shots you want to combine. Like shooting film, using a silhouette for your first image and a texture for your second image will produce an interesting final composite.

Photo by Denys Argyriou
The rest of the process will vary depending on your camera. Some cameras have even more settings and helpful controls available, so check your camera’s manual to see what options are available.
The final image will be created in the camera as the frames are automatically merged. This makes it a very simple technique that produces great creative results.

Photo by Ana Grave

Photo by Ian Keefe
Creating a Double Exposure Using Editing Tools
The final method to create a double exposure is to simulate the effect using a photo editor. Using this method gives you total control over the results and allows you to access a wide variety of tools to make creative alterations.
A simple double exposure can easily be created using a photo editor with a transparency(opens in a new tab or window) tool. This allows you to work with different elements, like two or more photographs, and alter the opacity to create a transparent overlay effect when the two elements are combined. Simply choose two photos and get started.

Photo by Lenny K Photography
Using a silhouette as your primary image and a textured secondary image will work well for this, just like they do for an analog or digital in-camera composite. If you don’t already have a secondary image, you could experiment with textures.

Photo by Victor Tondee
If you want to experiment further, you can use an eraser tool to get rid of texture in areas where it is unwanted and experiment with brightness and contrast to enhance your image.

Photo by Bekir tayfun Tokucu

Photo by Enrique Meseguer
Whatever technique you choose, remember to always have fun! Don’t be afraid to experiment. There are no rules and an almost endless combination of subjects, textures and methods that you can play around with.

Written by
Dawn Chapman


