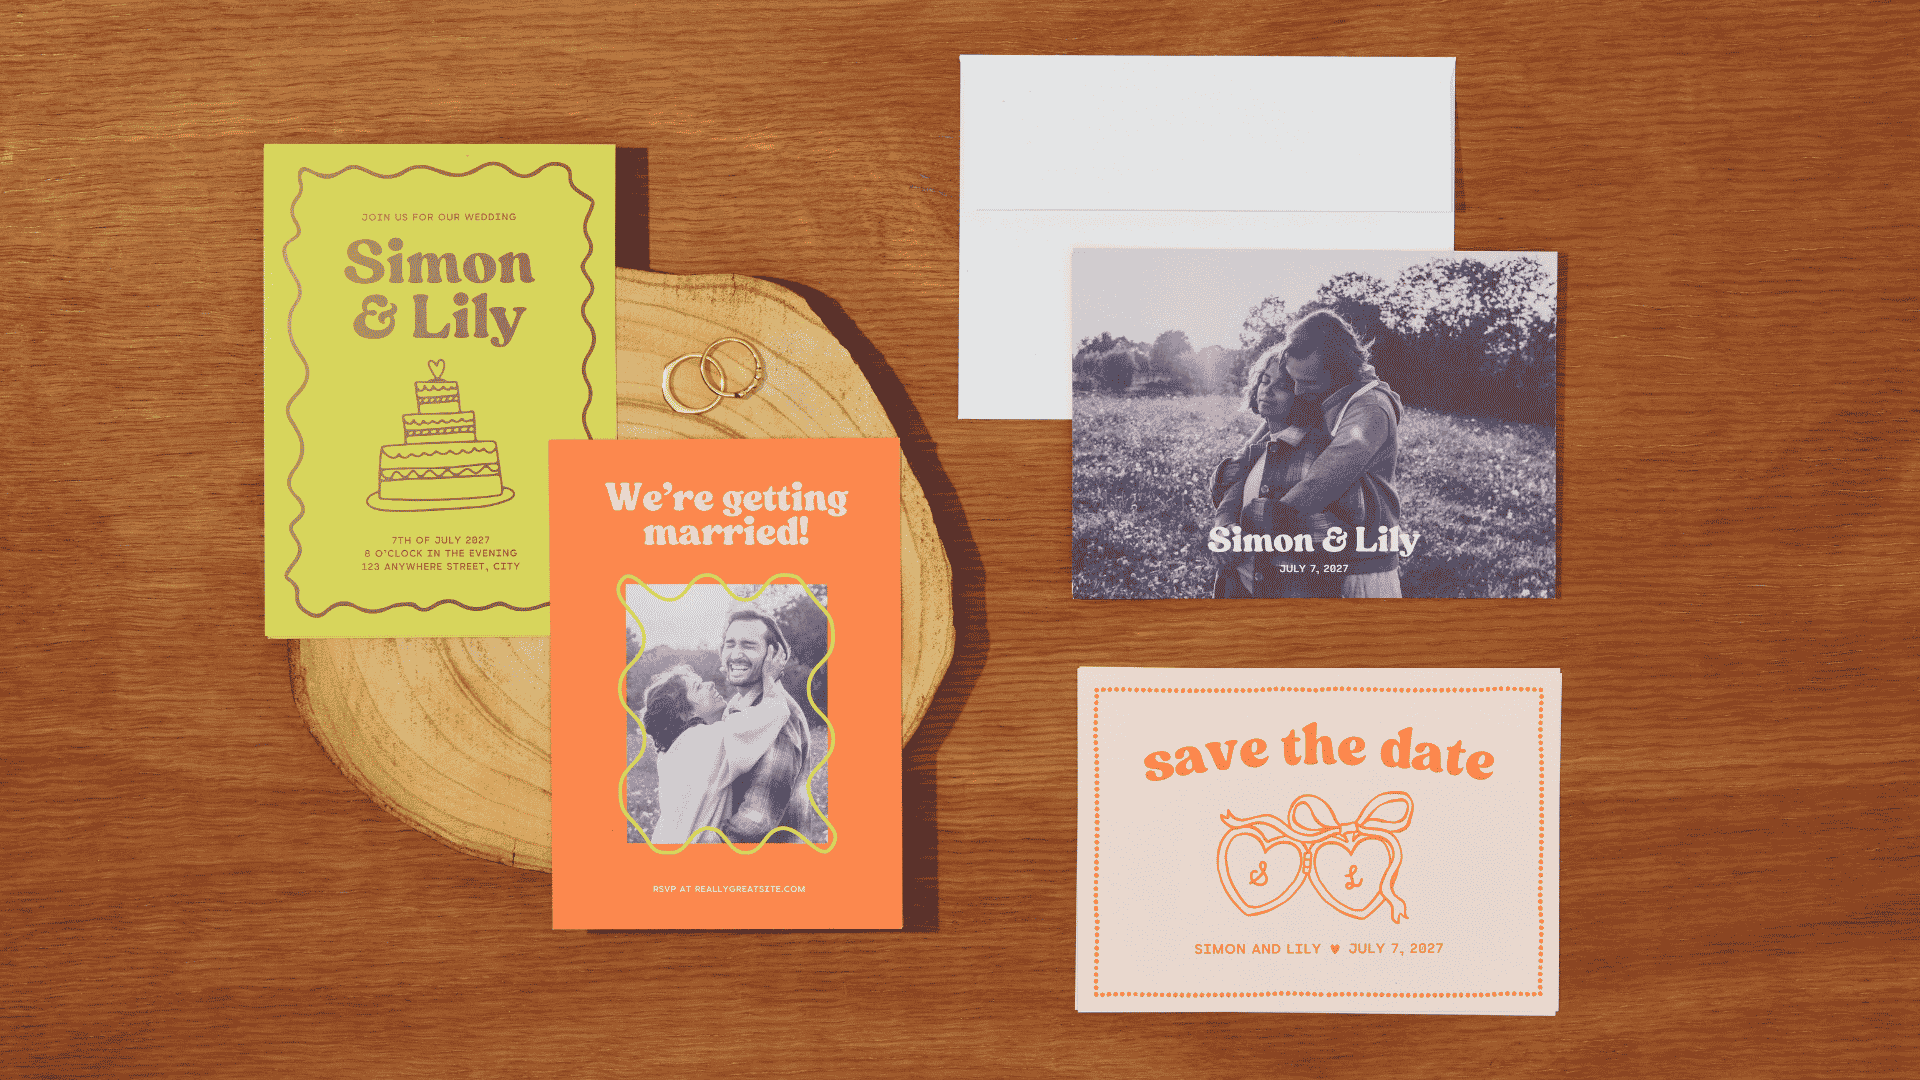
How to design and print your wedding stationery suite
8m
Beginner
From wedding invitations and save the dates to menus, welcome signs, and thank-you cards, learn how to design and print a cohesive wedding stationery suite in Canva. Start with one design, adapt it across formats, and bring it all together with ease.
How to design and print your wedding stationery suite
8m
Beginner
From wedding invitations and save the dates to menus, welcome signs, and thank-you cards, learn how to design and print a cohesive wedding stationery suite in Canva. Start with one design, adapt it across formats, and bring it all together with ease.
What you’ll learn
- How to create a cohesive wedding stationery look
- How to design one piece and adapt it across a full suite
- How to customise templates to match your style
- How to prepare and print your designs with confidence

Wedding stationery is where your big day starts to feel real. It's something you can hold, share, and come back to: an invitation on the fridge, a menu on the table, a moment your guests get to keep. From the save the date to the welcome sign to the thank-you card, each piece helps set the tone and bring your vision to life. The challenge is making it all feel cohesive without designing everything from scratch - you have enough to do as it is. That’s where Canva makes things easier. In this guide, you’ll learn how to start with one wedding design, adapt it across your stationery suite, and get it ready to print — all in one place.
Start with something that sets the tone
A wedding stationery suite usually starts with a bit of inspiration — a moodboard, a colour palette, or just a feeling you want to capture. From there, it’s about shaping one hero design you can build everything else from. That might be your invitation. It might be your save the date. Either way, this first piece becomes the visual foundation for everything that follows. Once this design feels right, the rest of the suite becomes much easier to build. You might already have a moodboard. Or you might just have a few screenshots saved, a venue in mind, or a rough sense of the atmosphere you want to create. That’s more than enough to begin. Think about the details that are already emerging: You don’t need a perfectly resolved aesthetic before you start, just a direction to test out and have fun with.Run with a visual direction

Keep your wedding stationery feeling cohesive
In design, cohesion comes from repetition with intention. That doesn’t mean every piece should look the same, but each one should feel related. The easiest way to do that is to keep returning to the same core ingredients: This is often what makes a suite feel polished. Not complexity, but consistency.
Work in one place
Keeping your designs together in Canva makes this much easier. When everything lives in the same file, you can: It also helps you spot when one piece starts drifting too far from the rest.
Choose a wedding invitation template
Starting with a Canva template makes the process much quicker, especially when you’re trying to design across multiple pieces.
Look for something with a structure you like. The colors, fonts, and elements can all change later.
Once you have a starting point, begin shaping it into your design. Update the names and event details. Change the typefaces. Adjust the spacing. Bring in colors from your original inspiration. Add or swap decorative elements until it starts to feel more personal. This is where your design stops feeling like a template and starts feeling like part of your wedding. A few thoughtful changes can go a long way: This is the piece worth spending the most time on, because everything else will build from it.Make it yours

Turn one design into a full stationery suite
This is where the process starts to feel easier. Once your invitation is working, you can reuse the same ingredients across the rest of your wedding stationery instead of designing each item from the ground up. That’s what creates cohesion. Not making everything identical, but repeating the same visual language across different formats. Place cards are a great example of how one design can be simplified and adapted. From there, copy over the elements you want to keep consistent from your invitation: Then adjust the composition to suit the smaller format. If needed, rotate or duplicate elements so they fit the new shape more naturally. Update the guest name, increase the size slightly if needed, and refine the spacing until it feels balanced. Menus are another easy place to extend the same style. Once the page is set up, bring your design elements across. Again, simply reuse the same color palette, type pairing, and decorative assets from your invitation, then rearrange them to suit the new format. Even if the composition changes, those repeated details help the suite feel connected. Your welcome sign is often one of the first pieces guests see on the day, so it’s a strong place to carry your theme through. Then copy your existing elements into the new design and scale them up. Increase spacing, adjust the hierarchy, and simplify where needed so the design still feels clear from a distance. The tone should feel familiar, even if the format is much larger. You’re not reinventing the wedding wheel every time. You’re taking one design language and letting it stretch across the suite. That saves time, but it also creates the kind of consistency people usually associate with professionally designed weddings.Create your place cards
Create your menu
Create your welcome sign
Why this works
Prepare your designs for print
Designing is one part of the process. Printing is what turns it into something real. Before you place an order, it’s worth taking a final pass through each piece to make sure it feels ready. Check the basics first: These are small checks, but they make a big difference once the design is printed and in your hands. When you’re ready: This is the point where the suite starts to feel tangible. Handy features like auto-proofing also help catch common issues before printing, especially if you don’t have much print experience. That can help flag things like awkward placement, edge issues, or sizing problems before they become expensive mistakes.Review each design
Preview before you print
Bring your whole wedding stationery suite to life
Once everything is ready, you can move from design to print without switching platforms or exporting files into a separate workflow. Once you’ve chosen your paper type, check quantities, confirm the details, and place your order. What started as one invitation design can now become a full set of printed pieces that arrive together and already feel like they belong to the same day. That’s what helps your stationery feel personal, polished, and connected from the first envelope to the day-of details.Keen to keep learning? Check out the video lesson and interactive activity below to dive deeper!