- Photo Restoration
Bring old photos to life with AI photo restoration
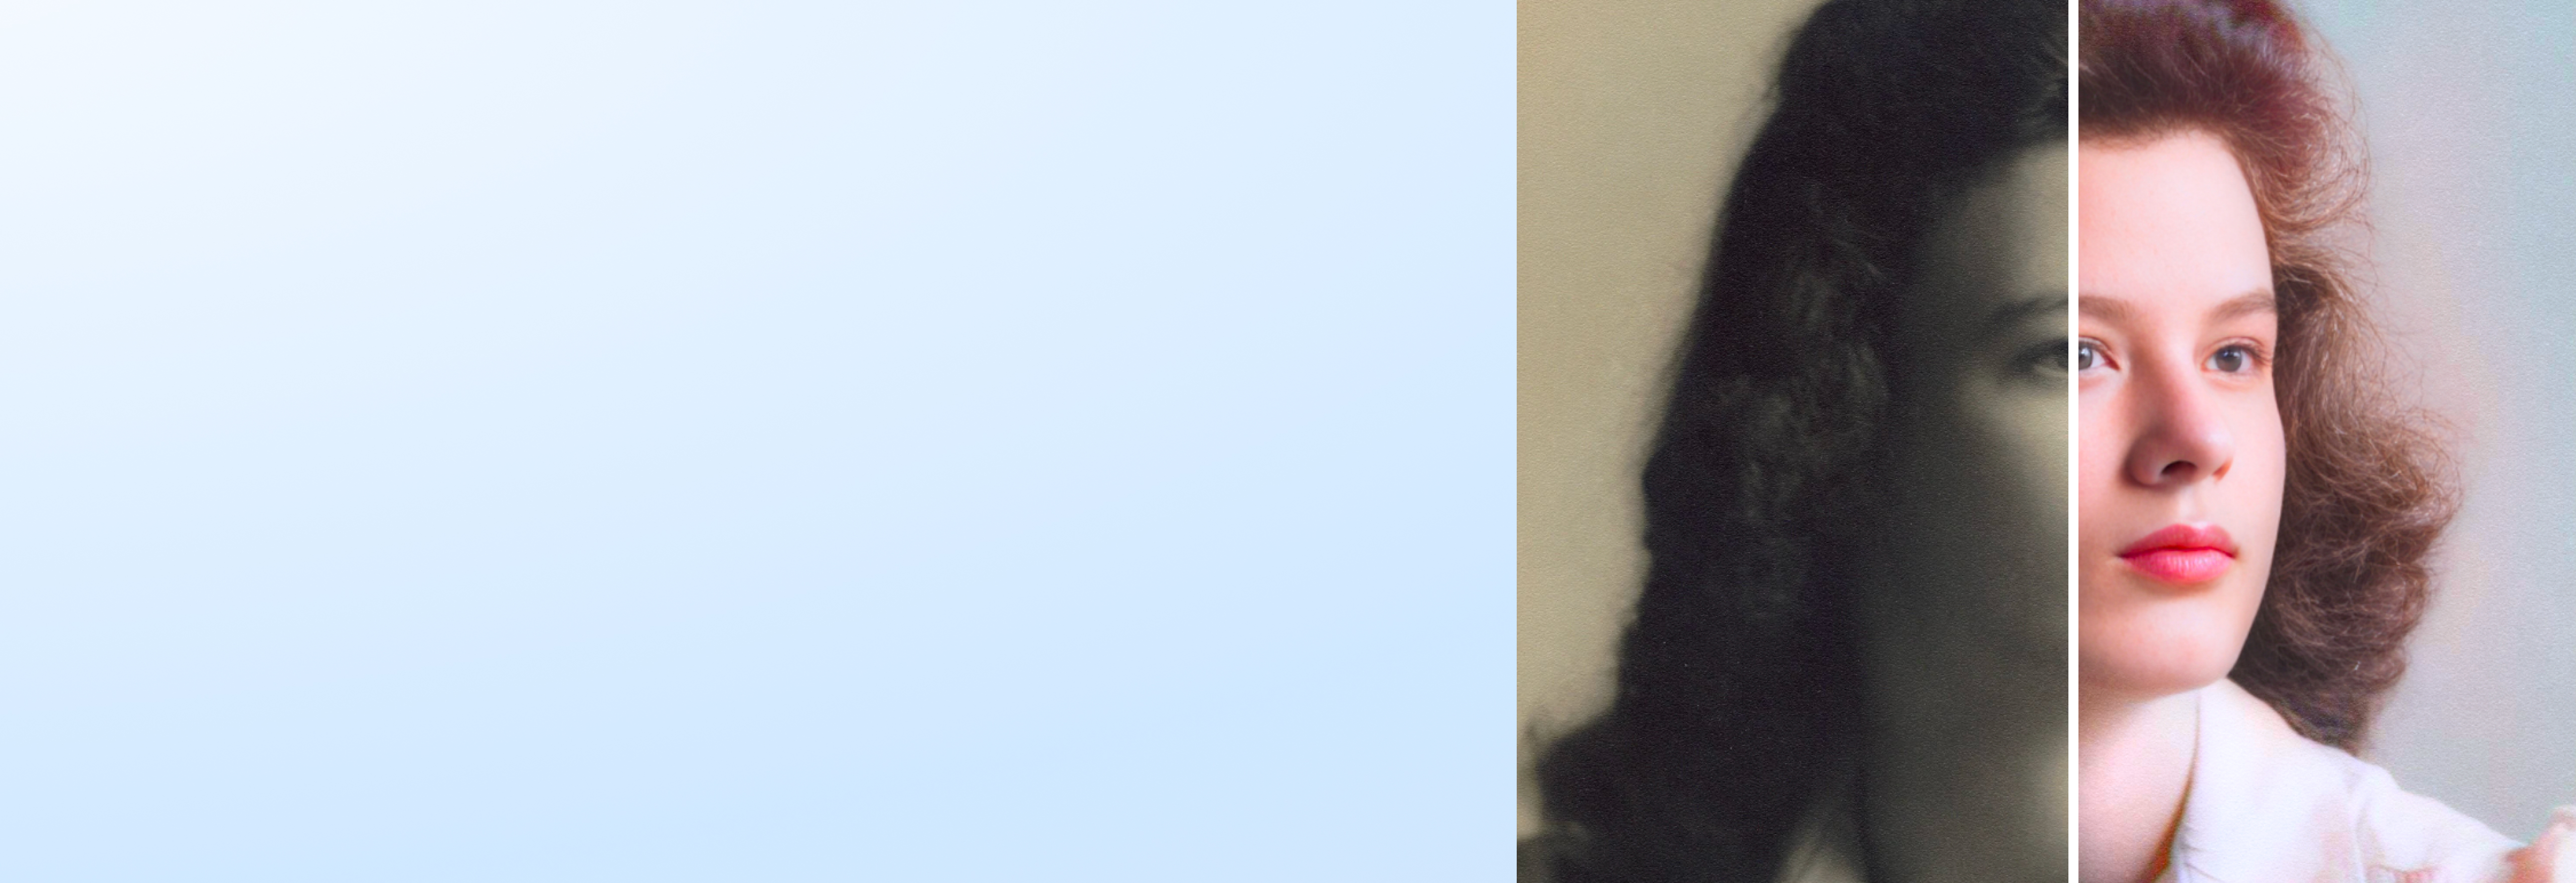
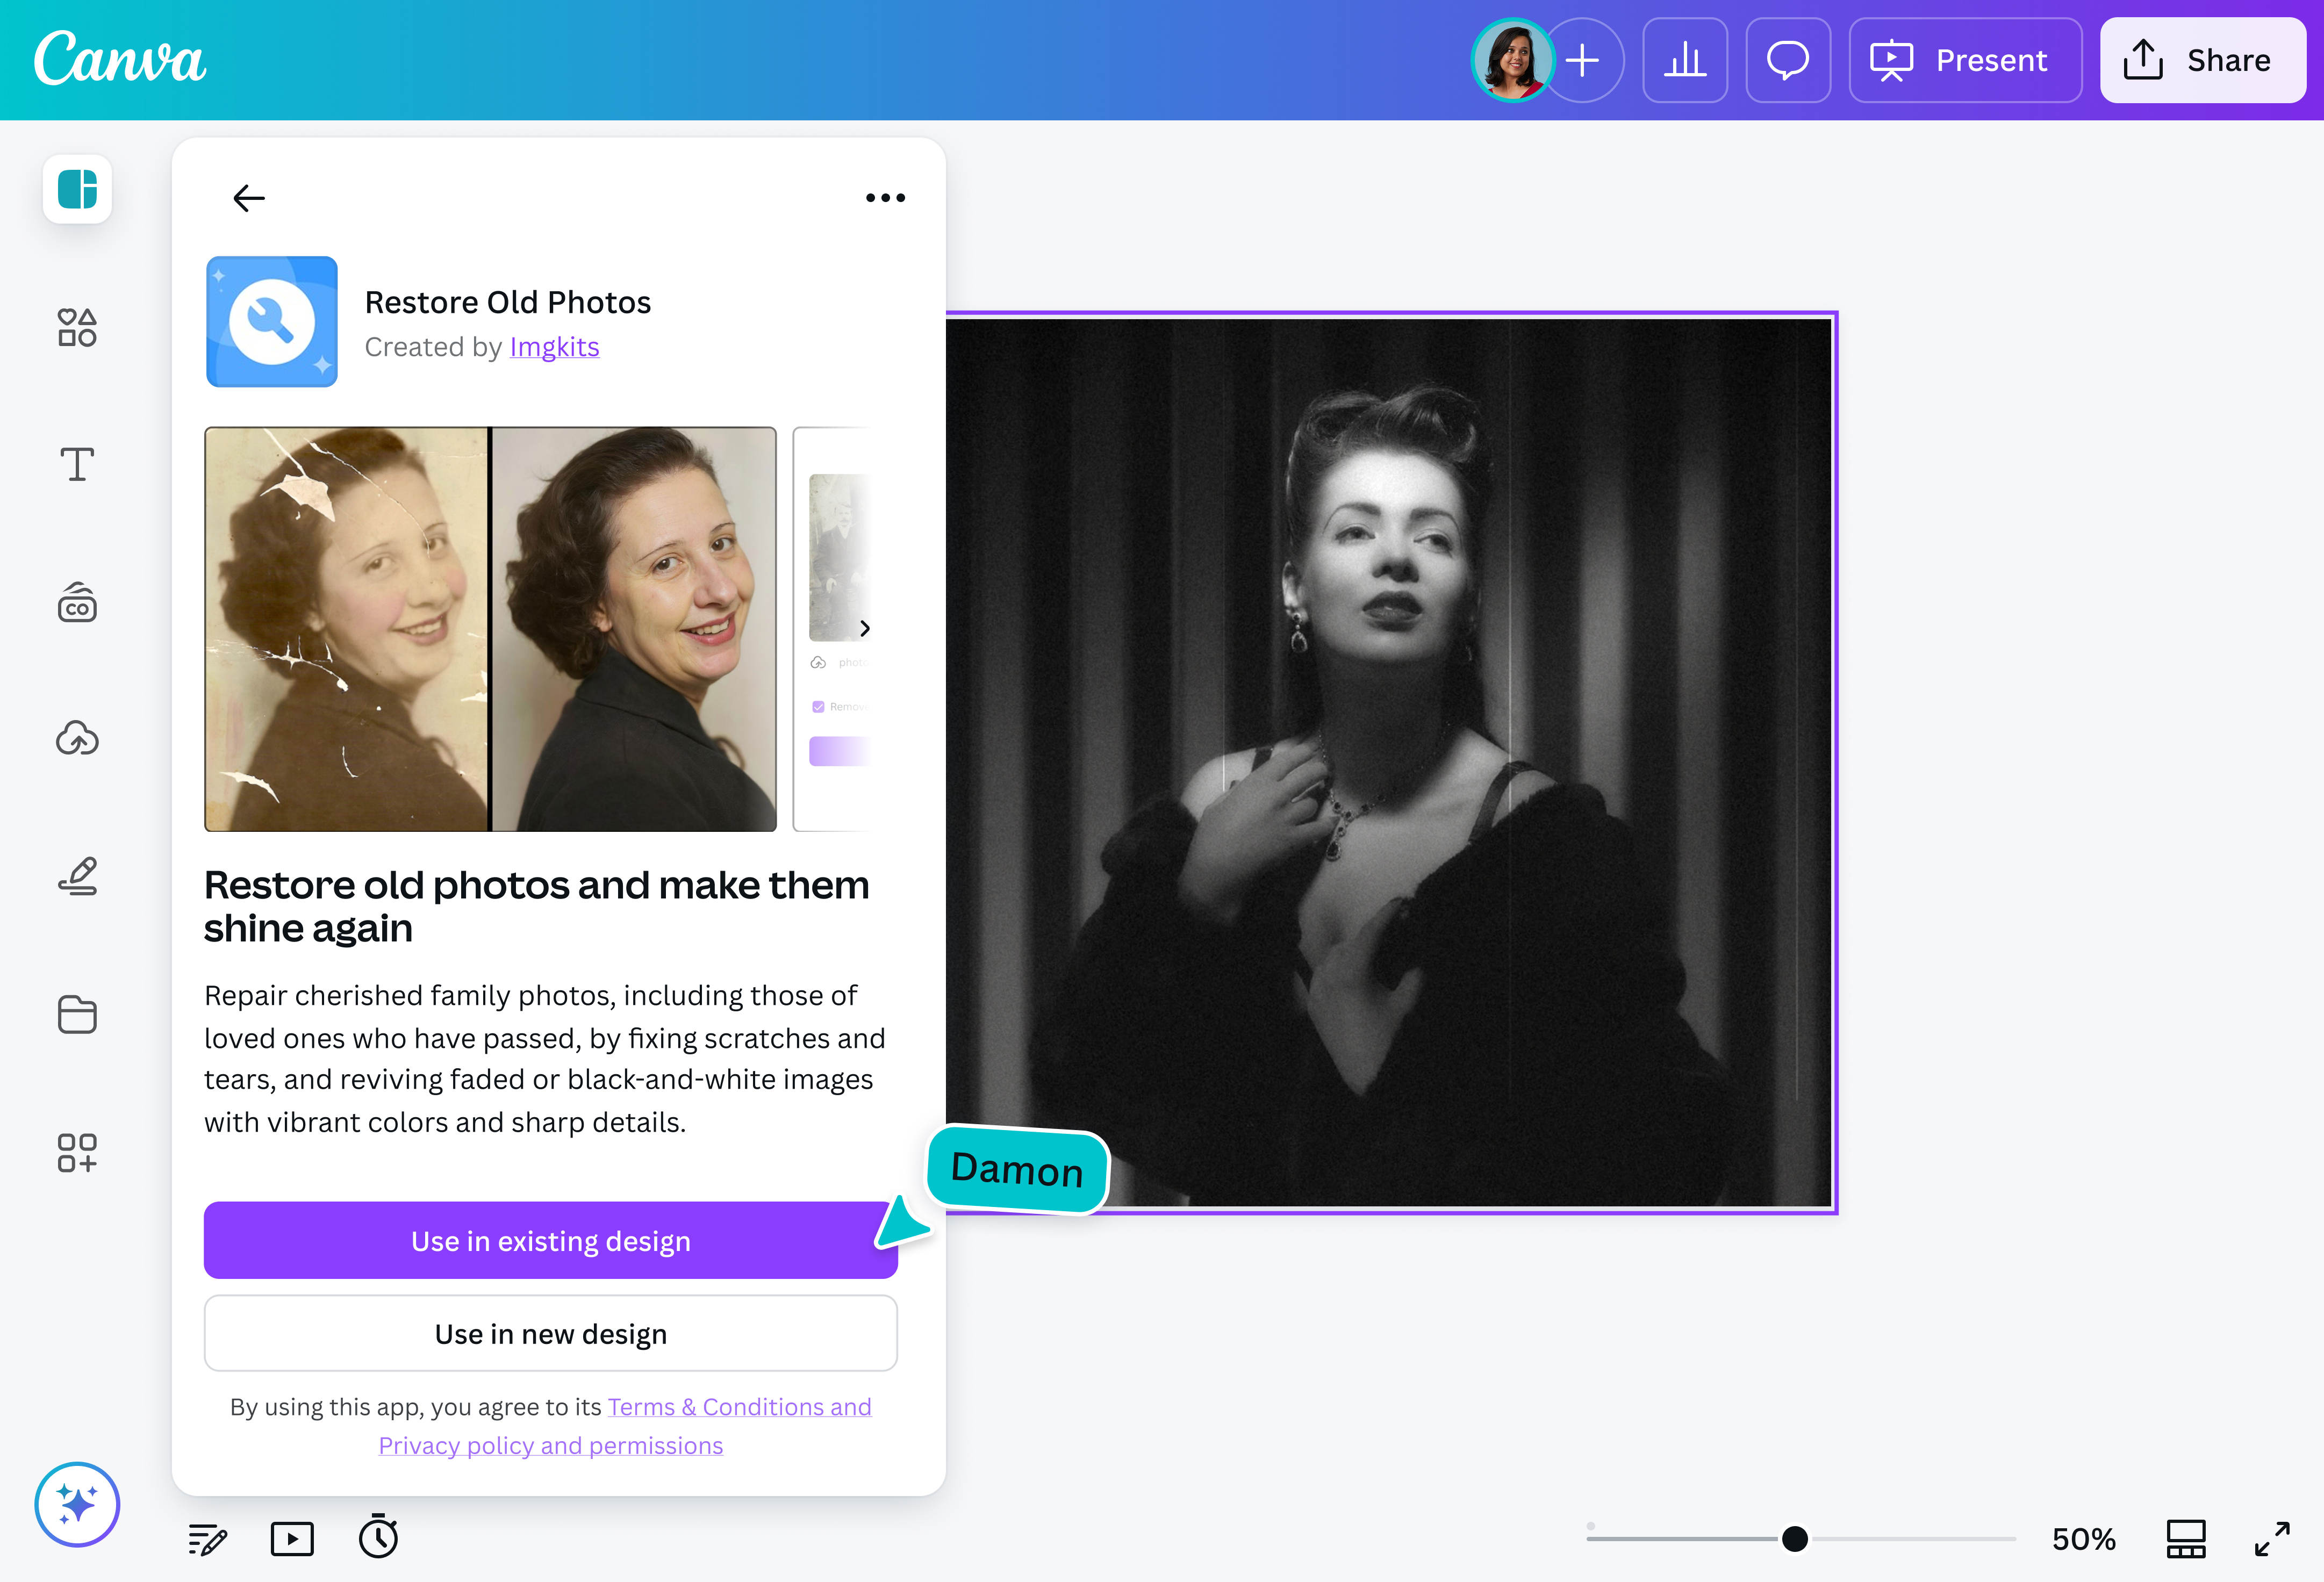
Relive precious moments in stunning clarity. Use the free online AI photo restoration tool on Canva to repair old photos and make them shine again—all in one click.
Revive faded memories in one click


Preserve your family's treasured photos with the photo restoration app on Canva. Upload vintage family photos and restore them to their original glory, removing creases, tears, and discoloration—not in days but just a few seconds. No professional tools or fees required.
Easily polish your pictures

Canva's easy-to-use photo editor(opens in a new tab or window) can help you enhance your recovered photos. Make your images come alive, quickly tweaking details like brightness, exposure, and white balance with simple adjustment sliders. Colorize(opens in a new tab or window) vintage black-and-white photos or upscale(opens in a new tab or window) them to a higher resolution that’s perfect for printing at any scale.
Watch your photos transform like magic

Canva’s Magic Studio™(opens in a new tab or window) brings together the best AI-powered tools to make your photos look professional without the hassle. Replace elements in your restored photos with Magic Edit (Pro), extend your image in any direction with Magic Expand (Pro)(opens in a new tab or window), or spot-clean unwanted details and objects in your old photos in one click using Magic Eraser (Pro)(opens in a new tab or window).
More than just a photo editor

With Canva, photo restoration is just the start. Browse thousands of ready-made templates to get inspiration on how to use your restored photos in other creative projects. Curate a family photo album(opens in a new tab or window), design a presentation(opens in a new tab or window) of your family genealogy, or turn your favorite pic into a memorable gift. You can even collaborate with and send your design to others, download your photos for printing, or share them directly on social media.
How to restore old photos

Frequently asked questions
- Photo restoration is the process of digitally repairing and enhancing old, damaged photos. The goal is to restore the photos to their original quality, free from creases, fading, tears, and other signs of damage.
- Yes, they can! With digital tools and software, most old photos can be restored to their original state or, at least, close to it. However, if the original image is extremely faded, damaged, torn, or of low quality, it can affect the quality and accuracy of the restored photo.
To do a photo restoration, first scan the photo at a high resolution for maximum detail. Scan in color to capture the full tonal range, which makes stain removal easier.
Start with major fixes, such as large tears, unless the photo restoration app has done it automatically for you. Then, work on small sections at a time and use a small brush size for a more natural result. Sharpen subtly to avoid the “crunchy” look.
After restoring your photo, don’t forget to add final touches, such as adjusting the tone or adding filters, until it looks exactly how you want it. Once you’re happy with the result, save it as a high-resolution image.
- The best software for old photo restoration is the one that effectively removes signs of damage while offering a comprehensive editing toolkit to further improve your photo. A free and intuitive platform is a huge plus, as this makes photo restoration accessible to everyone, from beginners to professionals.

@navneet4