- Video Transitions

Tell better stories with free video transitions
Bring storytelling to the next level with free video transitions tailored just for your project on Canva’s online video editor. Add transitions and effects to your videos to subtly showcase scene changes, smoothly move the story along, or seamlessly join separate shots.
or drop it here
Learn about Canva's upload formats and requirements. See how we use your content in our Privacy Policy.
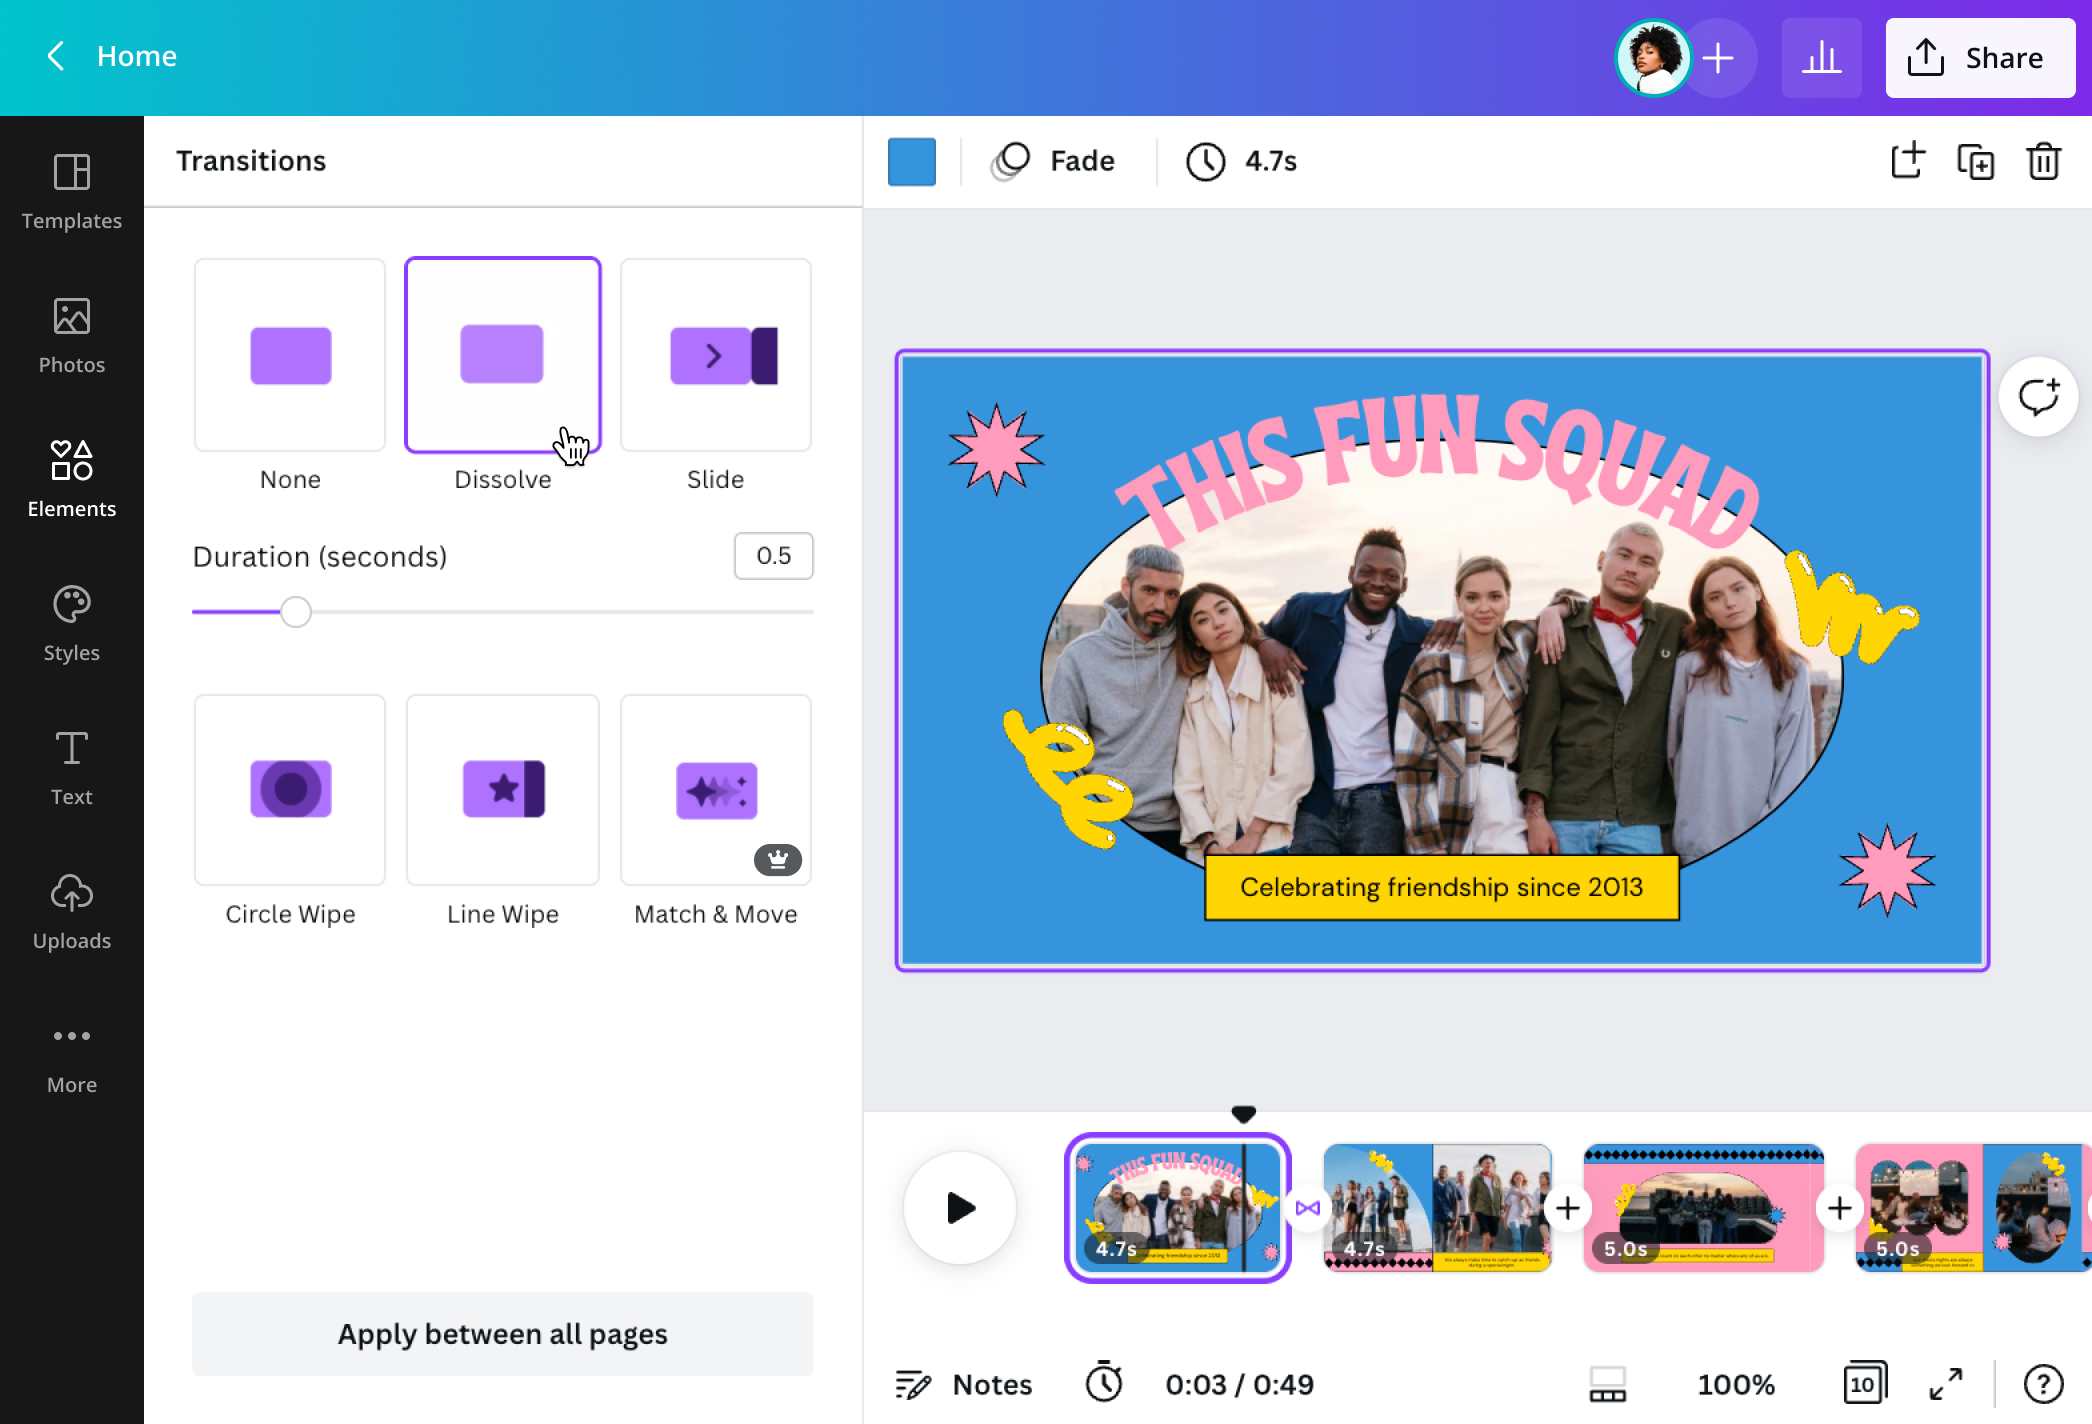
Play around with scene “Dissolves”

A dissolve transition gradually overlaps one shot or scene with the beginning of another scene. Apply this free video effect at the end of one scene to show the passage of time or a change in angle, location, or narrative. It’s perfect for your Instagram Stories to showcase your “day in a life” clips or hype reels for your brand to feature your event activities in different locations.
Surprise with slide transitions

Cool transitions turn your TikTok videos(opens in a new tab or window) or Instagram Reels into a fun and hippy bingewatch. Move an image or clip from one side of the screen to another with a slide transition. It's commonly used to animate graphics with numbers or text, but it can also be used to create a thrilling pace between your footage and cover more frames smoothly on bite-sized videos you can upload on social media.
Delight with line and circle wipes
When you want to add emphasis to a scene or a frame on your vlog or short film, a wipe transition is the way to go. One shot replaces another by moving from one side of the frame to another or with a special shape. Using our video editor(opens in a new tab or window) transitions, you can add line wipes to replace the previous shot from left to right and circle wipes to gradually reveal the next frame in an inward or outward movement.
Amaze with Pro transitions

There are more exciting video transition effects to weave your clips all together like our AI video generator(opens in a new tab or window) with Canva Pro. With Match & Move, you can animate identical elements smoothly between pages. Use it to automatically add transitions that best work for your project.
How to make transitions in videos
Frequently Asked Questions
- A video transition is a special effect in film and video production that changes one shot or scene to the next. It's done by cutting out a section of the footage and replacing it with another. You can use a video transition to smoothly move from one shot to another, or add movement to your static shots.
The best time to use video transitions is during a scene or narrative change. Remember, transitions help keep the moods and themes of a video consistent by making the flow nice and smooth without jolting the audience. Choose what transition best fits the story you are trying to tell.
Dissolves are best used to show time passage or a change in narrative. A quick or short dissolve may indicate a few hours or minutes, while a longer dissolve can showcase a longer time frame.
Slide transitions work best if used if you want to reveal something on the next scene or frame. Use it once or twice in an edit.
Wipes are best used to create interest or emphasis for the next scene or frame. Though once a popular cinematic transition to move between parallel action, use it sparingly and only when intending to create a comedic effect or convey a dream or surreal sequence. With the right timing and execution, wipe transitions can make two scenes subtly look like a single continuous shot.
- In a line wipe transition, one frame appears from left to right or up to down, gradually revealing the next shot/frame, and the previous frame remains in the background as the new frame appears into the scene. On the other hand, in a slide transition, one frame appears from left to right or up to down (and vice versa), then gradually pushes the previous scene/shot out of the frame.
- To set the duration of your chosen Canva video transition, navigate to the Transitions menu. It will appear on the left sidebar after clicking the + icon between each slide/frame on the timeline. Then, select Add transitions. Once the Transitions menu appears, click the transition, and the sub-menu items like duration and direction will appear. Under Duration, drag the dial to the right to increase the length of time the transition appears or drag to the left to reduce the duration. You can also simply input the number of seconds on the box beside it.

@IGchef_andrewb